Category Archives: DIY

How I Track My Money

edit-main

I’m a big fan of creating a budget and sticking to it, especially when you’re pretty strapped for cash. Between owning a business and starting a family, the past couple of years have necessitated a budget. I’m proud to say that we have not racked up any new debt, which is impressive after several years of doing just that. I wanted to share one of the tools that is most instrumental in tracking my income and expenses.

Several years ago, I was the champion of balancing my checkbook. I did it every month without fail and always balanced. Then I started using debit cards much more, and keeping receipts and writing down amounts got to be way too cumbersome, so I just didn’t do it. When you know things will be covered, that’s not terrible — but sometimes you want (and should want) a little more control. I tried using Mint for a while, but my online banking required so much verification that it wouldn’t sync easily with Mint, and there were so many things being saved as “Uncategorized” that I was spending too much time editing transactions and it just didn’t work well for me.

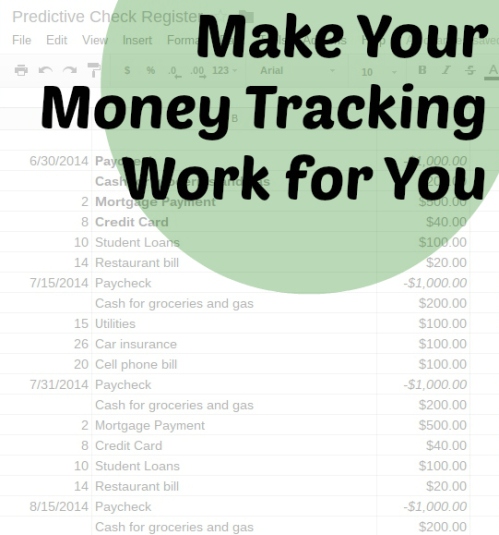
One thing I am consistent about is opening up my Google email and calendar every morning. From there, it’s easy enough to click into Google Drive and open up my “predictive check register”. I call it that because the most useful aspect of it is that I add future income and expenses so that I can see if my balance will ever drop to dangerous levels and I can adjust as needed. You’re welcome to use whatever kind of spreadsheet program you like — I love using Google Drive because it ties in with other services that I use, there are plenty of smartphone apps, and it’s free. You can also share your spreadsheet with another Google user, so if several people in your household need to track finances all in one place, this is the way to do it.

Let me introduce you:

arrows

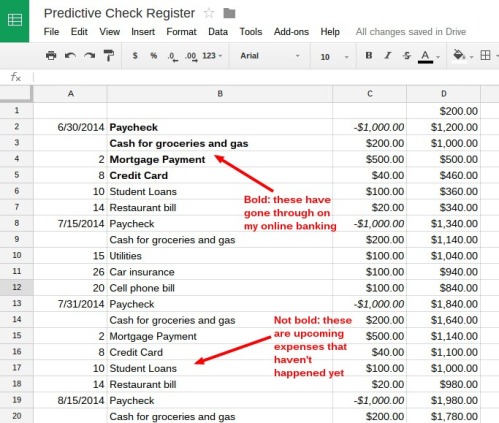
Column A: The dates of the income and expenses. I get paid twice a month, so I have those dates in place. I list due dates (or estimated due dates, as some of them change) next to the name of the expense (Column B).

Column B: The name or category of the income or expense. Keep them generic or make them specific based on your needs.

Column C: The amount of the income or expense. These are just samples, so don’t get too excited. You can put exact amounts if you know them, but when planning ahead you sometimes have to estimate. I like to round up to the nearest dollar or the nearest $10 — so, if I have a bill that is $68, I will estimate $70 or even $75 to give myself a cushion. I check my account online at my bank’s website so I can see what’s gone through. I change the text to bold if it has gone through; this way there are no surprises. When I put in my income, I put a minus sign ( – ) in front of the amount so that my formula works in Column D.

Column D: This is the running total. If you’re just starting out with this process, you’ll put your starting balance in the very top (where you can see the $200 in the image). Then you put in a simple formula (in this example, and if you’re using Excel or Google, it would be =D1-C2 so that your expenses are subtracted from the running total number above it). Fill the rest of the cells going down with the formula, and you should be good to go.

I mentioned that I make the text bold when an expense goes through my bank account. I love this because I can see what last went through and then look across to Column D to get the total that my bank account should be. I compare that with my online banking to essentially “balance” my checking account.

I can also look ahead and see where my account will be the lowest, or if cash is building up and we’ll have enough money for something fun. If unexpected expenses (or income, but let’s be honest, that’s rare) come up, it’s simple to add them in on the date they occur by inserting a new row. Then I can fill the appropriate cells with the formula and see how it will affect my account a few months down the road.

I’ve been doing this very consistently since October, and it’s been honestly one of the best ways I’ve found of tracking my finances and staying on top of everything.

How do you track your finances? 

Abstract Ombre Sunset

photo (2)


I whipped this up at my library’s last Crafternoon session, which included instruction from a real live professional artist (thanks, Nicole!). We used acrylic paintings and explored how to create various textures and mix colors, and then we just went for it. I’m partial to orange, so I mixed up a gorgeously rich peachy orange color and started swiping it on the canvas (8″ x 10″). I used the deeper shade on the bottom, then started adding white. I didn’t mix white into orange on the palette; instead, I just grabbed a glob of orange and a glob of white with the brush at the same time and brushed it onto the canvas. As I moved up higher on the canvas, I just added more white and less orange. Any color mixing happened directly on the canvas.

I’m really pleased with how it turned out — it’s reminiscent of a sunset, I think. When I’m staring at a blank canvas, I get intimidated and am afraid of making the wrong choices — picking the wrong color, making a mistake, using a brush that’s too small. Once I get started, though, it feels natural and intuitive. I’m not sure what all that means, but I like it and am planning to do more painting soon.

DIY Abstract Phone Wallpaper

I bought the Waterlogue app (iOS, $2.99) a while back and have really loved using it to turn my so-so photos into works of art.

Painted in Waterlogue

The effects are gorgeous, and you can choose 12 different styles of watercolor. I tend to just stick with the Natural effect for simplicity, although the others give you great results as well.

I was hankering for a new iPhone wallpaper, but I didn’t know quite what I wanted. I love abstract art, as you may know, so I thought about running some random images through the Waterlogue process to see what came out.

If you’re a parent and you let your kids play with your phone, you probably have images that look like this:

photo 1 (1)

That’s a shot of Aoife’s blanket, super duper close up. This toddler is obviously a natural photographer. I ran it through Waterlogue, did some rotating, and got this:

Painted in Waterlogue

Beautiful, right?

I made a few more – see the before and after:

photo 2 (1) Painted in Waterlogue

And here’s one of the clouds at sunrise:

photo 3 (1) Painted in Waterlogue

I love how they turn out, and I’d love to make some prints of them. I don’t know how well that would show off the watercolor effect; any ideas? Maybe at a small size and behind a frame would work.
Here are other bloggers’ takes on the Waterlogue app:

Now I’ve started actively looking for good abstract things to shoot, so I can waterlogue them. What do you think of the effects?
Bookshelf Hack and Poop

I can’t wait to see what search terms lead people to this post.

First, I have a little life hack that you may find helpful if, like me, you have things propped up on bookshelves and also have a plethora of rocks carefully selected by a toddler. You may remember my bookshelf. A couple of days ago, it got bumped and my priceless work of art fell behind it. If you’ve ever tried to move a bookshelf holding a few hundred books, it’s not all that fun. I wanted to not have to do it again, and I discovered an elegant yet simple solution: I grabbed one of the rocks collected by Aoife and slipped it behind the picture.

photo


It’s unobtrusive and not readily visible, and it will prevent me from having to shimmy the bookshelf away from the wall and squeeze my arm into a space an inch wide. Super easy? Yes. Super awesome? Heck yeah!

everyonepoops

Which brings me to the subject of poop. Not really, but Everyone Poops is one of Aoife’s new favorite books. We picked it up at the library mainly because we’re getting into the potty training phase and I thought it might be helpful to normalize the whole process. I remembered hearing about it when it first came out in the US in the early 90’s and just recalled the jokes I’d hear about it. Is a book about poop joke-worthy? Yeah, probably — and this one knows it. Is it also a great topic to talk about with your kids, that we probably wouldn’t want to talk about too much on our own? Of course!

Aoife loves this book — whether it’s the simple pictures, naming the animals, or just the fun of pointing out the poop on each page, we end up reading this one frequently. Reviewers evidently didn’t feel the same way. A review in Publishers Weekly stated that kids will likely enjoy the book, “but their parents may well not want to read to them about it.” To that I say — so? There are a lot of things I don’t want to read about to Aoife: bullying, poverty, sex, racism, and only using a purple crayon when maybe your favorite color is actually yellow. But to present an age-appropriate subject in an age-appropriate and, above all, interesting format is crucial for parents and children. 

I realize I’m complaining about reviews written over a decade ago, but they struck me as being written by non-parents, or worse — people without a sense of humor or wonder about the world. What does a whale’s poop look like? I’d honestly never thought about it, but by golly, you know I’ve Googled it since reading this book. (Psst — let me save you the trouble.)

Would you read about poop to your child? Do you consistently typo “poop” like “popp”?


Abstract Art

Abstract art is my favorite kind, both to look at and to create myself. I love getting caught up in the colors, shapes, and textures that cover the canvas.

You may remember this beauty that now sits on my bookshelf:

IMG_9534


I’ve been inspired lately by abstract landscape photography. There are some great examples on my Pinterest board for painting inspiration. I’d also been inspired by a recent post by The Nester. I have some acrylic paint sitting around just dying to get used, so during a recent naptime I decided it was time.

The one I created the other day is not necessarily an abstract landscape, but it follows the same idea. I used an old painting that I had done several years ago and never liked, just covering it up with white, black, and yellow.

abstract

I added the paint directly to the canvas and just started mixing with my paintbrush with back-and-forth strokes. I may go back and do it over, because some of the lines from the old painting show through and create a texture that I don’t want. Or, I might live with it for a few days and decide the texture adds character, who knows.

I tend to get intimidated by a blank canvas, but this method of painting is simple and (dare I say?) foolproof. It’s freeing to take an old painting and cover it up with something new and improved, and it does away with some of the inhibitions you feel with a fresh canvas.

What’s your favorite kind of art? 

My Stylin’ Bookshelf

I’ve always been mystified by the styled photos of interiors I see in magazines, in blogs, and on Pinterest. “No one actually can live in a house that looks so perfect, right?” I would ask, and of course — the answer is no. They can’t. Images are styled for photographs and then things are moved back to where they were originally, a few dust bunnies reappear, and life goes on.

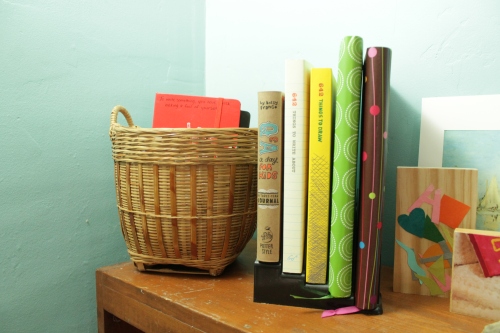
BUT. I love the look of those styled interiors. We all do, that’s why they exist. So the other night, I set to work styling my bookshelf. I don’t have a mantel, which is often the subject of those perfect images, but I do have a pretty happening bookshelf. It’s a focal point in the living room, and I try to spend a lot of time there. It too often falls victim to clutter — it’s just such a darn convenient place to set random things that need tending, and two weeks later I realize I have to dig it out. My hope is that styling the bookshelf will help prevent that from happening.

IMG_9532


When styling interiors, I fully believe that it should remain useful and should include items that are meaningful to you. I’ve seen teen girls’ rooms styled with random books just because the cover’s color added a nice contrast. I’ve seen offices with stuff all over the desk because it looks cool. Are you really going to move your model Eiffel tower, three Reader’s Digest condensed books, and vintage typewriter every time you want to write a blog post?

With that in mind, I styled away. I’ve been inspired lately by the words over at The Nester – it doesn’t have to be perfect to be beautiful. Let’s take a closer look …

IMG_9535

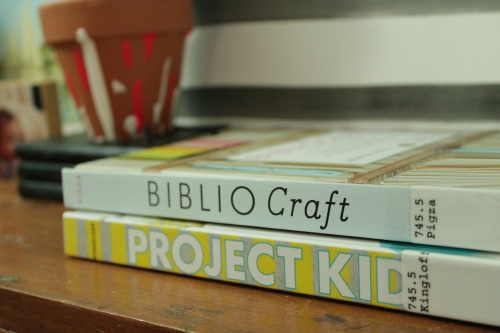
I’ve got these two checked out from the library right now, and they are imperfectly marked with yellow sticky notes (you’ll see in a minute). I’m really excited to do some of the projects!

IMG_9534

This fancy piece of modern art was made by … me! You’ll never guess how. Done guessing? I used shoe polish to make lines on canvas. This was a project where I didn’t even have to wait for naptime to do it. It took all of two minutes, plus a little bit of drying time. I really like the gradient effect, and I think it makes a great backdrop on my bookshelf.

IMG_9533

Something a little more classic now — a print of a Monet painting. This was gifted to us several years ago, before we moved into this house, as a matter of fact. We were always waiting for the right frame or the right place to put it. Well, I found it. I need to learn that art is meant to be enjoyed, not boxed up somewhere waiting for the right time.

IMG_9536

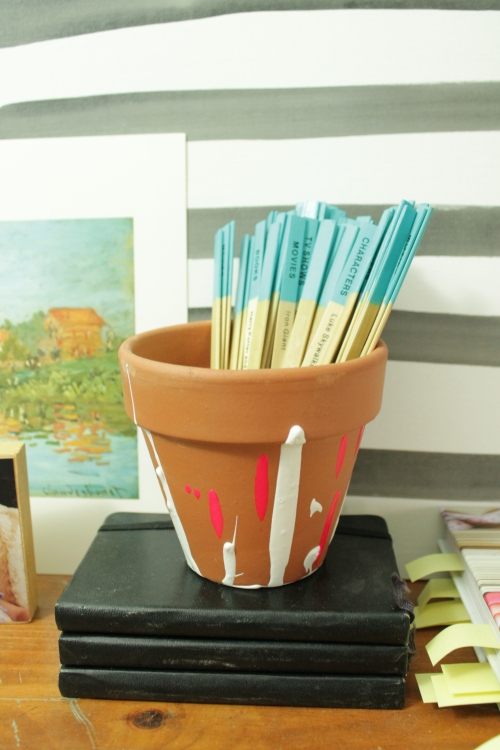
You were waiting for those sticky notes, right? Well, there they are. I just made this flowerpot at my library’s Crafternoon program, and I love how it turned out. I threw in a game of charades on sticks, made by Hallmark (and I think not made anymore), and stacked it on top of a few Moleskines (that I actually use!).

IMG_9537

No area on display would be complete without a photo of our little darling. I love putting photos on wood blocks for an easy display idea. No frame required, and it adds a nice depth to a display. The rocks were added by the darling herself — she loves collecting rocks when we are out walking, and we needed a place to put them where she could check them out periodically. I think they add a nice touch. The collage on wood was made by Aoife, with a little help from me — I cut out shapes, she brushed on Mod Podge and stuck the shapes where she wanted them. When she was done, I added another coat of Mod Podge and called it good!

IMG_9541

And finally, a collection of notebooks and writing inspiration. I’ve been trying to get back into writing poetry and fiction, but it’s been slow going. However, I did write a poem the other day that I felt really great about, so maybe it’s starting to trickle in.

So that’s my new and improved bookshelf. The lower shelves are mostly organized, but little hands love to pull random books out and flip through, so the organization doesn’t always stick.

What do you think of styled interiors? Would you ever use shoe polish in an art project? And how long do you think the cleanliness of this surface will last?

DIY: Moo Card Magnets

Long ago, there was a promotion at Flickr where you could get a few Moo minicards free. I ordered them, and then for about five years have had minicards floating around my house. I finally decided I absolutely must use them for a project.

I had lots of magnet-making supplies from my forays into Etsy selling (rebooting the shop is in the plans, so stay tuned).

photo 2

Guess what I did next?

photo 3

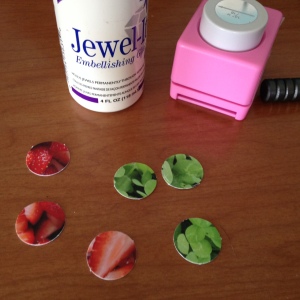
I was able to get three circles from each Moo card. The paper is pretty sturdy, so it took some oomph to get the circles punched.

photo 4

photo 5

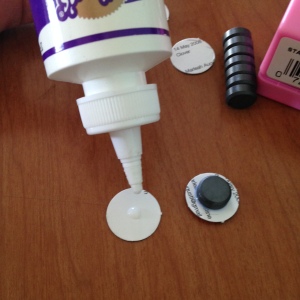
If you’re using super strong magnets like mine, be sure you don’t put your finished magnets near each other for the glue to dry! If they are within a few inches of each other, they’ll attract each other and possibly ruin your magnets!

IMG_9465

These magnets are easy to grab onto, and the Moo cards are affordable enough that it’s not the end of the world if they get a little worn over time. However, since the paper is thick, I see these lasting for quite a while.

DIY: Flower Power Earrings

earringsheader

If you’re anything like me, you have a stash of crafty stuff from years ago that you have yet to use up. Long ago, I picked up a package of felt embellishments that are intended to be used for scrapbooking, decorating photo frames, or whatever else you can think up. Well, however many years later, I thought something up …

photo 1

Jewelry-making is much more my speed than is scrapbooking, and since it seems that spring may be here to stay (70s all this week!), I thought some nice bright earrings were in order.

photo 2

First, I took a large safety pin and made a small hole in one of the petals. This will be the top of the flower. The felt was pretty firm and thick, which makes it a little tough to work with but will make for sturdy earrings.

photo 3

I opened a jump ring using my jewelry tools, then worked it into the small hole formed by the safety pin. From there, it was easy to close that jump ring and add another, then finally add the earwire.

photo 5

As you can tell, it’s a very straightforward project but makes for some super cute earrings. These would be perfect for a little girl or for anyone who wants to add some fun, bright flowers to their wardrobe this spring!


Making Oobleck

oobleck

Recipes for Oobleck, slime, and magic mud are everywhere, but all you need to know is that cornstarch and water makes for major fun for kiddos. You probably already have a package of cornstarch in your kitchen – it’s one of those ingredients that, when called for, you only use a little bit and then have a ton leftover that takes forever to use up. If you do have to buy it, it runs pretty cheap at the store. Don’t bother with the boxes that can spill all over the cabinet; instead, you can get cornstarch in a nice plastic tub with a screw-on lid, and it keeps practically forever.

IMG_9286
The fun for kids starts when mixing it up. Grab your mixing bowl and add about a cup of cornstarch and 1/2 cup of water. Stir it up (be prepared, this stuff acts weird – if you want to get scientific, it’s called a non-Newtonian fluid), and feel free to add a little more cornstarch or a little more water to get the right texture. You can add a bit of food coloring too, but food coloring can sometimes stain, so use caution.

The easiest way for Aoife to play with it is to pour it on the tray of her high chair. Keep in mind, even though Oobleck is made with edible ingredients, it really shouldn’t be eaten. We get about 20 minutes of playtime before Aoife starts trying to test the limits and put it in her mouth, which is longer than we get with Play-Doh. If you’ve got older kids (let’s be real, this stuff is fun to play with at any age), the fun will probably last even longer.

IMG_9281

Oobleck (named for the Dr. Seuss book) acts like both a solid and a liquid depending on what you’re doing with it. If you smack it, it feels solid, but if you rest your fingers on it or put it in your palm, it will run like liquid. To clean up, simply run the tray and your your toddler’s hands under running water.

IMG_9284

For something a little more contained, you can also pour your original cornstarch/water mixture into a Ziploc bag. It will still feel cool and act crazy like Oobleck does, but there will be even less mess. If you’re ready to kick it up a notch, you can try Dancing Oobleck! We haven’t done this yet, but it looks awesome. And for more fun, check out a couple of videos of people walking on Oobleck. Then go try this crazy stuff for yourself!


DIY: Mod Podge Map Necklace

modpodgeheader

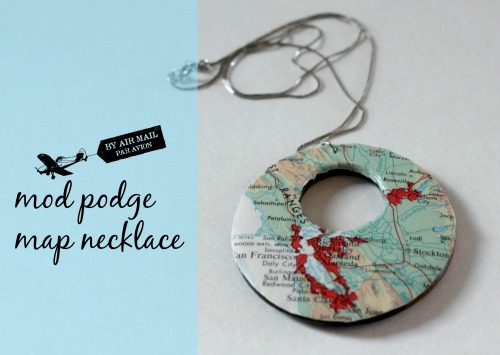
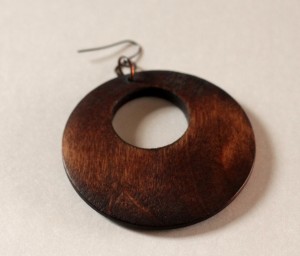
I’ve had a pair of round wooden earrings that have gotten quite a bit of wear. Lately, though, I’ve neglected them and I realized they could use a change.

IMG_9224

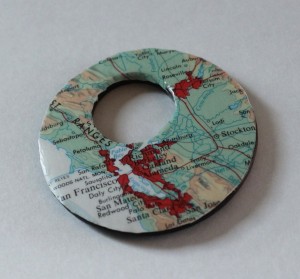
Enter this tutorial from Happy Hour Projects. I love the dictionary page she used, but I had a stash of maps just crying out to be my new necklace.

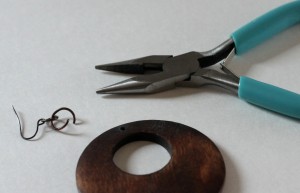
IMG_9227

My earrings were already darkly stained, so I didn’t do any prep work. I removed the earwire (tip when working with jumprings: rotate your wrist when opening the ring, rather than pulling the two ends apart), then positioned the wooden circle where I wanted it on the map.

IMG_9230

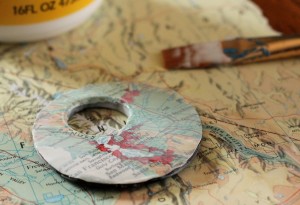
I traced around the outside of the circle, then cut it out. A tip here: the paper will fit better on the circle if you trim it slightly smaller than the circle itself. I added Mod Podge to the back of the cut-out map as recommended in the tutorial, then applied it to the wooden circle.

IMG_9233

Once it dried, I added another layer of Mod Podge, making sure to get the outside and inside edges. Then add a jumpring and a chain, and you have a new necklace! I was able to re-use the hole that was already there; a safety pin worked wonderfully to poke through the paper and Mod Podge.

IMG_9235

I wore the necklace today with a white t-shirt and rust colored skinny jeans, to bring out the colors in the map.

Do you have any jewelry that needs a refresh?