Category Archives: Eating

Rainbow Layer Cake

We recently celebrated a second birthday for our sweet little girl. She’s not to the point of having a favorite color yet, but she’s learning colors right now and I wanted to have a colorful cake for her. Forgive the phone pictures — it was late when I baked.

photo 4


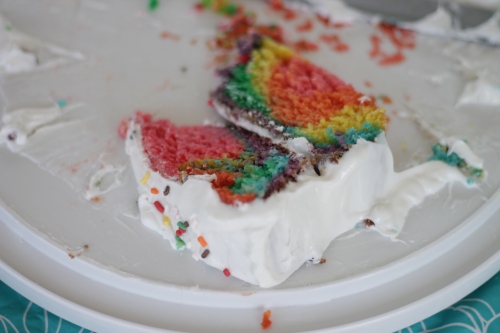
Looks delicious, right? And colorful — wait, what’s that? No?

IMG_9881

How about now?

This cake was a lot of fun to make and, for the record, my first layer cake. Here are the steps so you can make your very own.

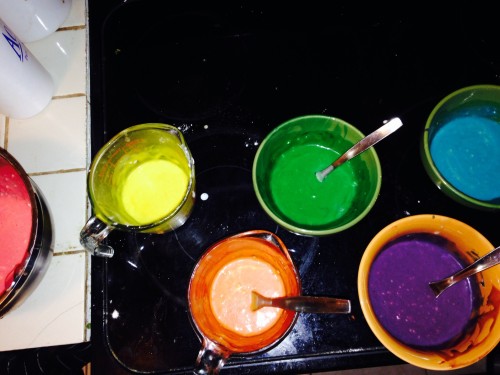
You can use any white cake mix or recipe; I used the vanilla cupcake recipe from The Joy of Vegan Baking, which is my go-to. For two layers, you’ll need to make a double batch (or just mix it up twice like I did — I only have one round cake pan). Mix up the batter and divide into six bowls. Add food coloring accordingly so that you have red, orange, yellow, green, blue, and purple.

photo 2

Can you believe how technicolor that batter is?

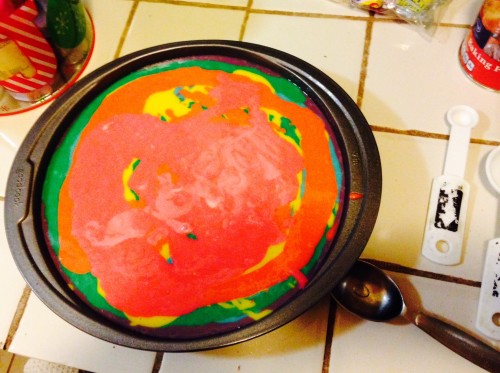
Once you’ve got your batter prepped, add to a round 9″ cake pan. I added all of the purple first, then blue, green, yellow, orange, and red so that my rainbow would be right side up. Really, this doesn’t matter too much — it won’t go in perfect layers and will have more of a tie-dye effect.

photo 1

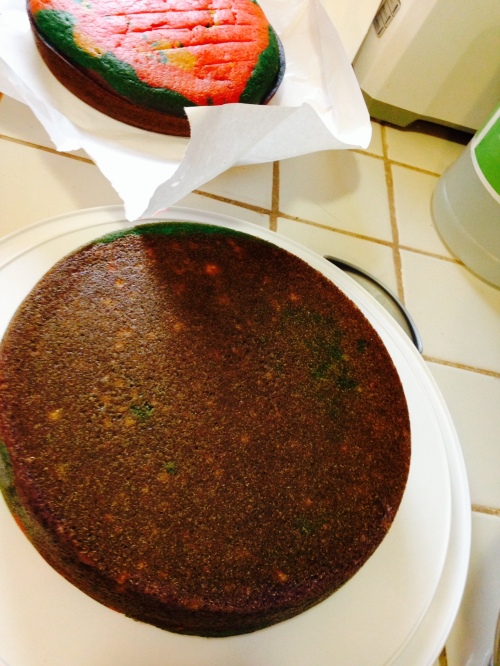
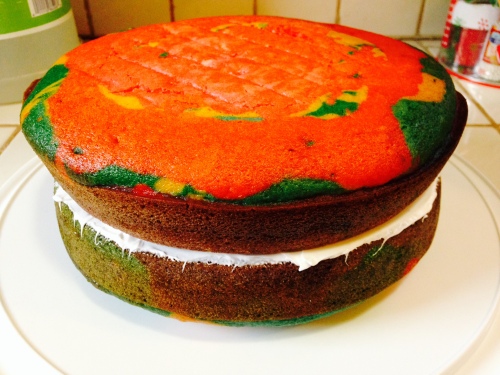
Bake according to your recipe or package directions. If you have only one cake pan, like me, you’ll have to bake your cake and let it cool before you can remove it and then proceed with layer #2. Once layer #1 is cool, you can use a butter knife to go around the sides of the pan to loosen the cake. If it’s completely cooled and you are very very lucky, it will come out of the pan clean. You’ll want to turn it upside down on your surface so that the curved top of the cake is facing down.

photo 2

Voila! You can see layer #2 in the background. This picture was taken the following morning. I did this whole process in two sessions: the night before the party, I baked the cakes, let them cool, and then wrapped them individually in freezer paper and put them in the refrigerator. Then it was 11:30 and I went to bed.

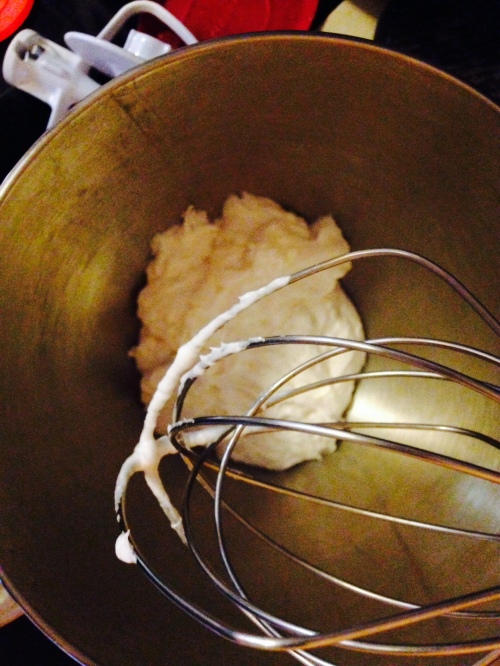
The next morning, I put layer #1 on my lovely cake transporter base and then started prepping the frosting. When I say prepped, I mean I opened the tub of Duncan Hines “Fluffy White” and dumped it in the KitchenAid mixing bowl, whipping it to make it go farther and spread a little more easily. If you’re using packaged frosting, you will probably need two tubs (this will give you a little leftover for taste-testing).

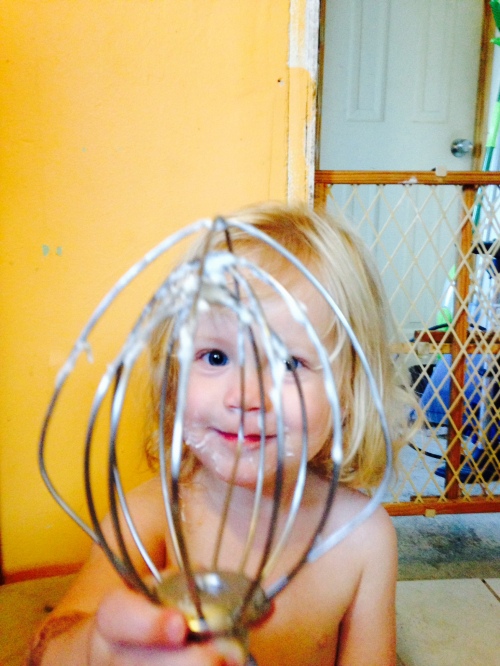
photo 1 photo 3 photo 2


Like so. I’d hoped to finish everything before this little munchkin woke up, but to no avail.

Once your frosting is ready, you’ll want to put frosting on top of layer #1 before you put layer #2 on top. I used maybe half a cup of frosting in the middle. I probably could have used more, but I wanted to be sure that I had plenty left (and I did — too much. It was delicious).

photo 3

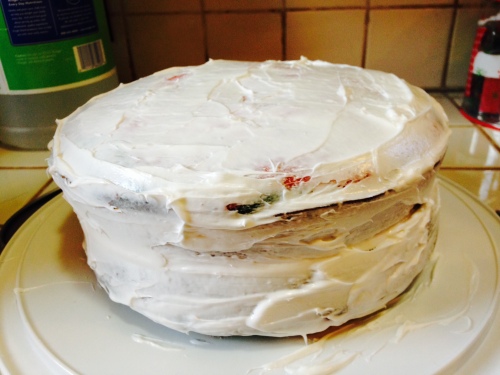
Put your second layer on top, with the curved top side facing up. I followed the directions in my cookbook for essentially doing a crumb coat. Lightly frost the sides and top of the cake and then place it in the fridge for around 30 minutes, until the frosting isn’t tacky anymore. This will help ensure that you don’t get crumbs in your frosting.

photo 1

When you take the cake out of the fridge, then you’re ready to finish up your frosting. Add frosting to the sides and the top, using a butter knife (or a cake decorating smoothing tool, if you’ve got it — I don’t!) to smooth it out as you go. My motto is “When in doubt, add more frosting.”

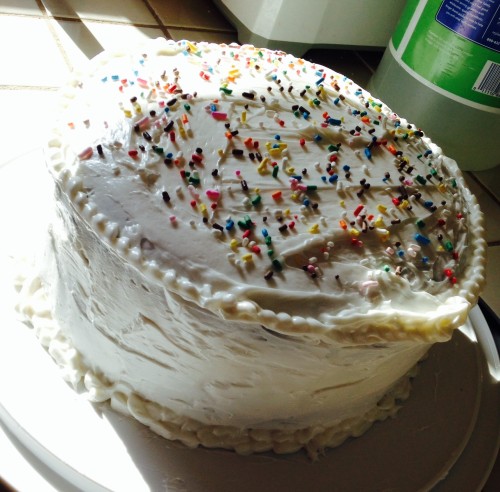
Once you’ve got it looking pretty even and uniform, put more frosting in a plastic zipper bag and snip one of the corners, or use a cake decorating tip and bag to dot frosting around the base of the cake and the top edge. This really helped make the cake look more structured and it filled the gap at the base. Plus it added more frosting.

If you’d like, add sprinkles to the top to hint at the rainbow goodness inside.

IMG_9874

Serve with a smile!

So my first layer cake turned out pretty darn good — and tasty, despite the ridiculous amount of food coloring that was involved.



Powerhouse Pancakes

If you know us, you know that pancakes feature strongly in our weekend routine. We had a special day earlier this week with extra time in the morning, so we took our usual pancake recipe and mixed it up a bit.

IMG_9646

Necessity is indeed the mother of invention. We were nearly out of flour, so I dumped some old-fashioned oatmeal in our food processor and blended away. You can do the same for this recipe — make plenty, and you can store the rest in an airtight container in the fridge. The freshly-made oat flour really added some “oomph” to the pancakes. A little vanilla and cinnamon in the batter, and we were ready to go.

IMG_9649

Powerhouse Pancakes (makes 8-12ish pancakes)

3/4 cup all-purpose flour
1 1/4 cups oat flour (directions above)
2 tbsp baking powder
1/2 tsp salt
2 cups soy milk (or your preference)
4 tbsp melted Earth Balance
3 tbsp pure maple syrup

3 tbsp corn syrup
1 tsp vanilla extract
1 1/2 tsp cinnamon

Combine both kinds of flour, baking powder, and salt in a medium bowl. Combine soy milk, Earth Balance, maple syrup, and corn syrup in another bowl. Add the liquid to the flour mixture and mix — I usually use a whisk to help eliminate lumps. Once it’s mixed, add the vanilla and cinnamon and stir.

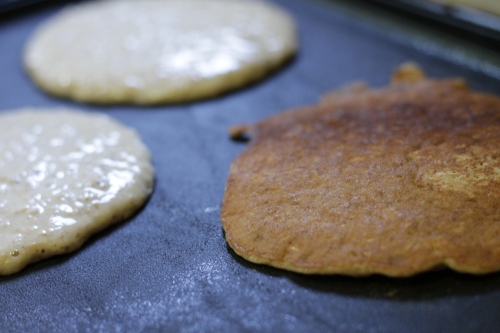
Heat griddle or skillet over medium to heat. If your griddle/skillet is not nonstick, then prep it accordingly. Once hot, pour the batter onto the griddle or skillet to form circles (or other shapes – my mom was always a pro at making turtle-shaped pancakes). The batter will start out fairly thin, but the oats help it thicken up.

Cook the pancakes for a few minutes on each side, until they are golden brown. Before the batter is fully cooked is a perfect time to sprinkle on any fruit, shredded coconut, chocolate chips, or other add-ins. 

I’m not sure if I accurately estimated the amount of pancakes that can be made using this recipe. Too many pancakes is never a bad thing — they can be frozen or kept in the fridge to be eaten later in the week for breakfast or a snack. The oatmeal adds a great heartiness to the pancakes, and they have fantastic flavor.

IMG_9655

My latest favorite toppings have been adding coconut to the batter, spreading the pancakes with peanut butter, and then adding strawberries in syrup. Pretty decadent, but just perfect for a weekend … or when you just want to spend a little extra breakfast time with the family. (Excuse the slightly blurry photo – I was to eager to dig in!)

Five Ways: Great Northern Beans

If you were inspired by my post about cooking beans from scratch, you’re probably all set to dig out the slow cooker this weekend. But once you cook those beans, what are you doing to do with all of them?

Here are five ways we keep some variety in our meals when we’re eating the same type of beans for a few days. Feel free to add your own variations and work with what you have on hand! Being able to mix it up keeps your food interesting and helps reduce waste. (#5 is pictured.)

IMG_9469_header

#1 – With brown rice and Creole seasoning

Creole seasoning is a mix of spices that adds a kick to whatever you’re preparing. I was first inspired to use it when I fell in love with red beans and rice in New Orleans, but it’s proved to be a versatile addition to our kitchen. This meal works great with leftover rice and heated in the microwave or on the stovetop

Add a side of your favorite veggie (usually green beans, when we’re in a hurry), a piece of fruit, and a slice of bread with butter (Earth Balance, in our case), and you’ve got a hearty but simple meal.

#2 – On bread as a sandwich

Sandwiches are easy, quick, and they pack well when you’re on the go. My husband can attest that these sandwiches are extra tasty after a busy morning. On your favorite type of bread, spread a layer of mayo (we use Nasoya), add Dijon mustard, and for added delectability, throw on a slice or two of avocado. This is another place that Creole seasoning makes an appearance — add a sprinkle onto your mayo before you add the beans. The beans like to move around a bit, so feel free to wrap it extra tight to keep everything in place. You can toast the bread too, which can help everything stay together.

These would also be excellent with a slice of tomato, but I haven’t had a chance to make it happen. I love to have a big juicy salad as a side with these sandwiches.

#3 – With pasta and sauce

If you’re vegetarian, you’d probably like to add some heartiness to your pasta. Cook up your pasta, and when you’re heating your sauce (marinara, alfredo, pesto, homemade, from a jar — whatever works for you!), add a healthy scoop of beans to the sauce. It gives some added texture, not to mention more fiber and protein. Add a side of veggies and fruit, and you’re done!

#4 – Tex-Mex style

Grab a tortilla and add a spread of sour cream (we use the Tofutti brand substitute) and some salsa. Cook up some strips of bell pepper (frozen or fresh are equally delicious), add avocado and rice, and then top it off with beans. Season with your favorite Southwestern or Mexican style spices — we like cumin and fresh cilantro (although dried will do in a pinch).

#5 – With fried rice and Italian seasonings

Is that an odd mix? You won’t think so once you try it — this is my latest favorite (pictured at the top of the post)! Add some vegetable oil to your skillet, on medium heat. Add the beans and some rice to your pan, then throw in some mixed vegetables (again, frozen, fresh, or canned can work equally well). Season with sage, basil, and oregano. I found this was best with a side of fruit and a slice of buttered bread. If you want to get extra fancy, you can top your fried rice with some Panko bread crumbs.

IMG_9470

She likes it, and let’s be honest — if she’s happy, everybody’s happy.

Do you have a go-to favorite for Great Northern beans? Is Italian fried rice a thing?


Brunch: The New Date Night

brunch_header

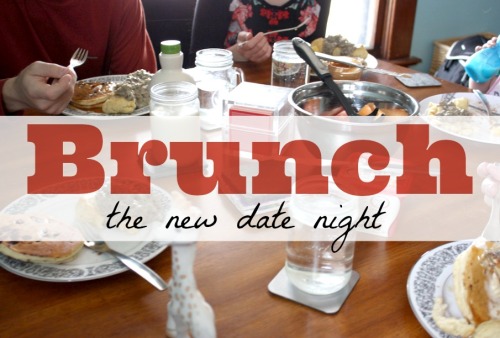
Need an idea for a weekend get-together that’s fun for all ages? Try a breakfast bar with DIY pancakes!

We had another family over for brunch this past weekend, which we’ve decided is the most ideal time for families with young kiddos to get together. Everyone is pretty fresh since it’s earlier in the day, it’s before most naptimes, and you still have the rest of the day to recuperate and then get the kids to bed on time. I don’t want to imply that this should completely replace good old date night with adult-only company; however, this is a great alternative when you want to get out and about but don’t want to resort to arranging a sitter.

You could easily stick to just serving pancakes or even waffles, but we wanted to add something heartier as well. Lentil gravy is perfect to serve on top of toast or biscuits. Cook your lentils ahead of time, then melt some butter (we used Earth Balance) in a separate saucepan. Add some soymilk and flour, then season with salt, pepper, sage, and oregano. We also used nutritional yeast and a touch of liquid smoke. Add a bit more soymilk or flour to get the right texture, then add drained lentils.

For convenience, we used an electric griddle, but you could easily do this on the stovetop as well. Mix up your pancake batter a little ahead of time, then set out add-ins and toppings. You can take orders as to what people want, or you can let folks add in their own goodies.

IMG_9354

Here are some add-in and topping ideas:

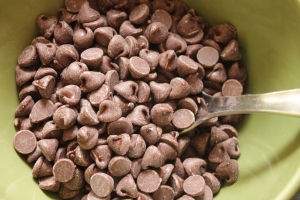
  • chocolate chips
  • shredded coconut
  • cinnamon
  • peanut butter
  • nutmeg
  • sprinkles

IMG_9352

Don’t forget the maple syrup! Add a side of fruit to your plate, and you’ve got a solid meal to keep you going for the rest of the day.

(Thanks to Holly for the great photo at the top, as well as the great company!)

After kids, did your get-togethers change? What are your favorite things to do on the weekend?

Cooking Beans from Scratch

dried_beans_scratch

Bags of dry beans on grocery store shelves can be pretty intimidating. Don’t you have to cook them somehow? And don’t they take forever to cook while I stand over the stove? And they’ll never turn out like beans in a can, right?

Guess what? It’s not very difficult at all to get tasty beans from a bag.

I’ve been using the following process for a couple of years now, and it’s pretty hard to mess it up. The process itself is a lot like my cooking stuff – no need to measure things and very forgiving. Plus, the process uses a slow cooker, so you don’t even have to be at home to get great beans!

If you need beans right now, then you’ll need to buy them in a can (they call it a slow cooker for a reason). But if you want to always have a stock of beans in your fridge ready to go at a moment’s notice, this process will work great for you. Let me break it down.

IMG_9262

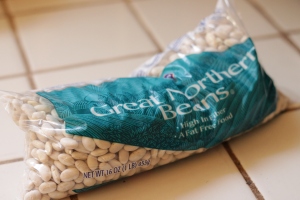
Grab a bag of your favorite beans at the store. Dry beans are much cheaper than beans in a can – a single bag will cost between $1.50 – $2.50, depending on the type of bean. I haven’t noticed much of a difference between the store brand and “name brands”, so you can make it more affordable by choosing the store brand or whatever is on sale. Garbanzo beans (chickpeas) tend to run a little bit higher, in our area, so I only get them when they are discounted. Pinto beans tend to be the cheapest, and I can get a 32 oz bag for about the same cost as a 16 oz bag of black beans. This process will work with any type of dry beans in a bag.

IMG_9264

Next, you’ll want to open the bag and pour it into a bowl. If your slow cooker has a removable insert, you can pour the beans right into there. Sometimes in the bean “harvesting” process, little rocks will be picked up along with the beans. This happens with any brand, so don’t think it’s just because you cheaped out and got the store brand. It just happens, and it only takes a few seconds to sift through the beans and look for the stones. In the last few bags I’ve cooked, I haven’t found any. In some bags, I’ve found up to 3 or 4.
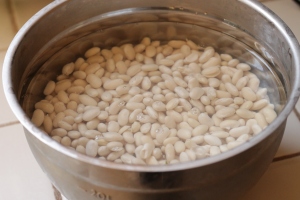
Once you’ve sorted the beans, fill your bowl or slow cooker insert with water, enough to cover the beans plus maybe half an inch over. This is the soaking part of the process, and it helps prepare the beans for cooking. Once the beans are covered with water, just slide your bowl or insert into the refrigerator. You’ll let the beans soak for around 8 hours, or overnight. Or longer. Sometimes we’ve gotten busy and the beans have soaked for an extra few hours. No worries.

IMG_9265


So you’ve got this bowl of water and beans in your fridge. Once they’ve soaked, you’re ready to cook them. If you’re using the slow cooker insert, you might want to let it sit on the counter for a bit to warm up so you’re not putting cold stoneware right into a hot slow cooker. However, the slow cooker takes a little bit to really get warm, so if you’re in a hurry, pop that insert right into the slow cooker. If your beans are in a bowl, pour them into your slow cooker. Turn the dial to “high” (that’s what it is on my slow cooker, anyway) and let it go. You’ll leave the slow cooker on for about 8 hours, or overnight.

Now, some beans take a little bit longer to cook than others. I’ve found that Great Northern beans tend to cook the quickest, maybe in as little as 6 hours depending on your slow cooker, and garbanzo beans take the longest. Black beans and pinto beans are somewhere in the middle. But the difference is negligible, so just figure your beans will take about 8 hours to cook.

IMG_9270

To check if your beans are cooked, take the lid off the slow cooker (watch out for steam!) and poke the beans with a fork. If they’re tender, they’re done. Sometimes cooked beans will float to the surface, or the skins will come off the beans in the cooking process. Garbanzo beans will sometimes have a residue that floats to the top of the water while cooking. This is all totally fine.

IMG_9271

Now that your beans are cooked, you’ll need to drain off all that water. Put your strainer or colander in the sink, and pour beans and water right into it. Next, rinse your beans thoroughly. Once the water runs clear, you are ready to put your beans in a container and keep them in the refrigerator.

IMG_9273

We use mason jars for just about everything, and this is no exception. They store well, they’re compact, and they last a long time – plus, they’re not plastic. One 16 oz bag of beans makes almost two jars worth. We go through beans pretty quickly in our house, so we know that when we get through the first jar of beans, it’s time to soak another bag of them. If you don’t go through beans so quickly, you can make them keep even longer by storing them in the freezer. To do this, instead of using jars, you’d put the beans in a Ziploc freezer bag, squeeze out the air, and place the bag in the freezer. They could keep for a couple of months. In the refrigerator, they could keep for a week or maybe two.

If you have a bag of beans bigger than 16 oz, you can either cook the whole thing and then store them in the freezer, or you could just cook a portion of the bag. I usually buy pinto beans in a 32 oz bag, but will only prepare half of them at one time. This keeps us from getting burned out on pinto beans, and it helps stretch our dollar a little further.

This process will easily make the amount of beans you’d get in 3 to 6 cans, at a much lower price point and with little effort on your part (other than a little bit of planning ahead). Remember, 16 oz of dry beans does not equal a 16 oz can of beans! A lot of the weight of the can comes from the water that the beans are packed in, that you drain off anyway. You get much more bang for your buck from buying dry beans.

How do you save money while you shop? And have you ever fixed dry beans?

Great Snacks for Toddlers

greatsnackstoddlers

Aoife’s been walking for a while now, so I’m calling myself the mom of a toddler. She’s definitely not a baby anymore, that’s for sure. For the time being (although if you know about parenting toddlers, you know schedules can change overnight), Aoife eats three meals a day and has an afternoon nap. Forever, she’s been a great eater and I’m thrilled that, at least for now, she eats pretty much anything we put in front of her, especially if it’s something we are eating too.

Snack time happens shortly after I get home from work, so I take that time to make a cup of tea and sit down with Aoife while she has her snack and talk about the day with her. We talk about what she and Daddy got up to during the day, and we talk about what we’re going to do for the rest of the afternoon. This is great one-on-one time, and I get a moment to breathe between work and all-out “Mom time”. For the sake of routine and getting into healthy eating habits (which helps avoid choking, not to mention the mess of finding crumbs in the couch cushions), when at home we always sit at the table in the high chair for snack, just like we do for meals.

Here’s a quick listing of some of Aoife’s favorite snacks.

Peanut Butter

Not by itself, obviously. Peanut butter is super kid-friendly, and it’s a great protein source for vegans and vegetarians. It’s also super affordable, easy to find, and goes with so many different things. We’ve used it in several different ways:

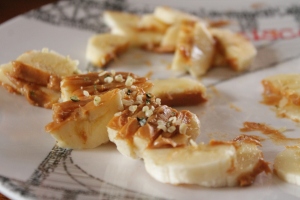
  • On top of a banana and sprinkled with hemp seed (a great source of omegas, protein, and fiber!)

IMG_9165

  • On a toasted slice of bread (great when short on time or when there’s nothing else handy – we all have those days, right?)
  • Mixed into a bowlful of those “puffs” sold in the store. I don’t buy a lot of packaged foods for any of us, so it’s rare that we have these on hand. I bought a tub of them because we needed something while on the go, and once we were at home they seemed so empty and not very filling. Enter peanut butter – pour the puffs in a bowl, add a tablespoon of peanut butter, and stir. In this case, I also added more hemp seed.IMG_9170
  • On a leftover pancake from our big Sunday breakfasts. Just pop that pancake in the toaster (my husband claims they’ll fall apart, but maybe that’s just the non-vegan ones that he grew up with – I have not had that happen in my adult life!) and add some peanut butter. No need for syrup at snacktime.

Peanut butter is also great with apples – one of my favorite snacks on the weekends (I try to follow the No S Diet – a topic for another post).

Any Kind of Fruit

Are blueberries in season? What about trying mangoes or papayas for a change? Fruit is a very simple snack to have at any age, and it’s great for toddlers because so many times you can just throw a clementine or an apple in a bag and go if you’re in a hurry. Add peanut butter if you need it to be a little more substantive, but for most kiddos, the piece of fruit (especially when high in fiber) should be enough to hold them over until dinner.

Avocados

I think avocados are technically a fruit, but I’ll categorize them differently here because they’re not exactly going in your ambrosia salad anytime soon. Avocados are full of good fats, which every growing kiddo needs for their healthy brain. They are pretty filling, and the texture is easy to eat. Try mashing the avocado and then spreading it on a piece of toast, much like you would do with peanut butter.

IMG_9168

Mixed Vegetables / Potatoes

Even my good eater sometimes leaves a bit of lunch untouched. When this happens, it’s easy to cover her plate and pop it in the fridge, bringing it out again when it’s time to sit down for a snack. Aoife responds to this really well, and it ensures that she gets the nutrients that she missed out on at lunch. If you don’t have any leftover from lunch, there’s no harm in grabbing some frozen veggies and warming them up in the microwave. And potatoes, whether they are mashed, roasted, or even sauteed a bit, are a filling and tasty option. Sweet potatoes can help mix it up a bit, if you’re looking for something a little different. If they haven’t already been cooked, plan ahead – they can take quite a while to bake and sometimes that’s not an option when a toddler wakes up – they want their snack now!

Water

A tall cup of water is essential for snacktime. Aoife drinks soy or almond milk at her three meals, so at snacktime  we mix it up and give her something more refreshing. Water is also a huge factor in making that little brain grow bigger and stronger, not to mention the rest of her body. We also have water throughout the day, especially as the weather gets warmer and we do more playing outside or running in the stroller.

What are your kids’ (or your!) favorite snack foods?

Great toddler snacks from around the web:

Keep in mind, this is what works for us. I hope to inspire you, and I appreciate your respect about how we choose to raise our healthy and happy girl!

IMG_9172

Oh She Glows: Chia Seed Jam

IMG_9190
I’ve read Angela’s blog Oh She Glows for a couple of years now, and her recipes (and photography!) are amazing. As soon as I heard that she was writing a cookbook, I put it on my list to watch, and I am so glad I did. Each recipe in the book features simple but delicious ingredients, and they are photographed beautifully (this woman is a superhero, obviously). As I flipped through, I started making mental notes of which recipes I wanted to make — and I had to revise that plan and just add it to my Amazon wishlist. Each and every recipe in this book was something I was interested in trying, and I can’t say that about many cookbooks.

IMG_9191

Isn’t she adorable?

IMG_9210

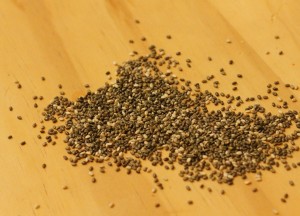
I settled on the recipe that I wanted to try (and then unfortunately had to return the book to the library — remember, wishlist!) because I had some chia seeds in the fridge and strawberries have been on sale. Magical Chia Seed Jam it is!

IMG_9194

I ended up modifying the recipe a bit anyway. No maple syrup or agave nectar to be had in the house (what is wrong with me?!) — I had corn syrup on hand, so I used that as the sweetener.

13574035494_963805071c_z

Here’s my super-hip-about-three-years-too-late Instagram shot. Jam in under 30 minutes! We’ve been having this on our toast and with peanut butter on pancakes. Tasty, but not overly sweet like store-bought jams.

If you want to learn more about vegan cooking and are looking for simple but always-impressive foods, Oh She Glows is the place to go. Angela is even gracious enough to sometimes post behind-the-scenes peeks at her cooking and photography process. She readily admits when a recipe does not turn out the first time and sometimes even provides photographic evidence, so, you know, it’s like she’s a real person.

Thanks for the great recipes, Angela, and keep on glowing!

Sunday Pancakes

One of the traditions at our house is making pancakes on the weekend. Ryan and I have fond memories of getting together on Saturday mornings when we were just dating and making platefuls of pancakes, smothering them in syrup, and endlessly debating whether they were better topped with butter (my view) or peanut butter (Ryan’s).

IMG_9121

Now that we’ve got a third functioning human here, we’ve included her in the fun. If she wakes up early, she gets to help stir and maybe even add some sprinkles, if we’re feeling especially special that day. If she sleeps in, we get to see her eyes light up when we go into her bedroom and tell her that pancakes are almost on the table.

IMG_9125

We use the recipe from Colleen Patrick-Goudreau’s Joy of Vegan Baking (page 68, by the way) and they turn out pretty perfect every time. We do variations on that theme sometimes – this past weekend I added a few scoops of cocoa powder for some chocolatey goodness. I’ve even embraced the peanut butter (or almond butter!) topping when we don’t have Earth Balance on hand.

IMG_9130
This is one of the simplest traditions a family can have, but also, I think, one of the most memorable.

Here are how a few of my favorite bloggers serve up flapjacks:


Rainbow Cupcakes

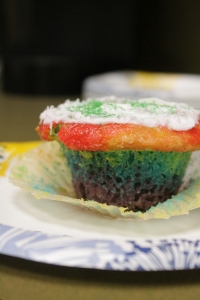
In case you hadn’t heard, today is Saint Patrick’s Day, and in honor of the holiday, I decided to make rainbow cupcakes — something I’d pinned on Pinterest long ago.

My original idea was to make yellow cupcakes with white frosting, and then add an Airheads Xtreme to each in the form of a rainbow. Sadly, my plans were foiled when stores didn’t have any of the candy in stock. So, I turned to Pinterest. Rainbow cupcakes seemed like the next best thing.

I started with the vanilla cupcake recipe from Colleen Patrick-Goudreau’s Joy of Vegan Baking. This cookbook has never steered me wrong, but the recipe apparently was going to make only 10-12 cupcakes. I wanted plenty, so I doubled the recipe. Then I went through the laborious process of finding containers big enough for the frosting and with no threat of food-coloring-stainage. I was successful in finding seven containers in all, one for each color of the rainbow. That process was probably the step that took the longest.

With my motley crew of plastic containers assembled, I roughly divided the batter. Very roughly. So roughly, in fact, that I ran out of colors at varying times during the process of actually creating the cupcakes, so not every cupcake is a rainbow. Some are … tie-dyed. You get the idea. Anyway, I got some great colors from the gel food coloring that I had on hand.

IMG_9156

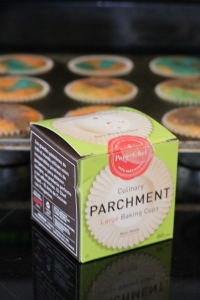
I did have a special find at the store — these parchment cupcake liners. I chose them because they claimed to be nonstick, and because there were 60 in the container and they were cheaper than the 32-count foil cupcake liners. In the end, they peeled away from the cupcakes very nicely (although I wouldn’t say they are absolutely nonstick, but #firstworldproblems, am I right?). And I’m glad I went with a 60-count package of liners, because doubling the recipe gave me 36 cupcakes. That’s three times the original recipe, and that’s even with some big honking cupcakes mixed in there. I was pleasantly surprised and left wondering if I had done the math correctly. They ended up tasting great, so no harm, no foul.

mathinthekitchen

I’m a stickler for accuracy (except when I run out of red-colored cake batter and say screw it), so I made sure to add purple first, then blue – green – yellow – orange – red so that my cupcakes would truly resemble a rainbow. If you’ve read everything up to this point, you understand that I had good intentions that then devolved into making “good enough” cupcakes. That trend continues, if you were wondering.IMG_9155

IMG_9154


You can see the gradual deprivation of red batter here. The cupcakes baked up beautifully. I waited FOREVER for them to cool, because I really wanted to frost them nicely. I did use good old Duncan Hines frosting because sometimes corners must be cut. I loaded up a “re-sealable plastic storage bag” with my frosting, cut off the tip, and began frosting. Or rather, I began shouting and scooping Duncan Hines frosting with my hands as the seam on the bag exploded. Best laid plans.

However, once I got a knife and spread the frosting around, and added a few green sprinkles, I had some pretty decent looking cupcakes.

IMG_9158


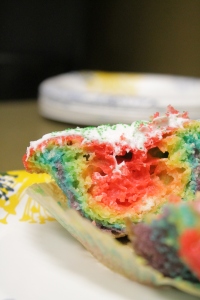
I cut into it to check out the layers, and yes …

IMG_9160


… pretty decent cupcakes. I plan on making these again — but I think I’ll splurge on pastry bags when I do.

Good Eats

Whether it can be attributed to my diet while I was pregnant or while Aoife was nursing, or if environment is more influential, we’ve been blessed with a “good eater”. Aoife has always been a fan of whatever her dad and I have put on her plate — except for when we gave her pureed green beans from a jar while we were traveling. She loves green beans, but those … can hardly be called green beans.

Aoife started solids around the time she turned six months old, while still nursing up until about 18 months. Her plate has come to be virtually identical to ours. As I said, she eats very well — usually if there seems to be an issue with something on her plate, in actuality it’s more of an external issue (being tired, most often) than anything to do with what’s on the table. I attribute her rapid growth from preemie status to upper echelon of her actual age group to her willingness to eat awesome food.

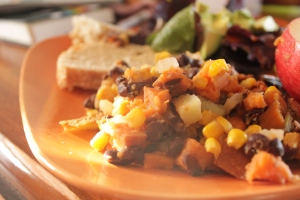
Recently we roasted up some sweet potatoes and russet potatoes, mixed in a few black beans, and added a side of salad, fruit, and garlic clove bread. The only thing Aoife wasn’t a big fan of was the bread, mostly because the bread is pretty crusty and was tough on her tiny teeth. Most notable from this meal: the girl loves salad.

IMG_9108IMG_9109 IMG_9111 IMG_9113

Edit: Tonight we had side salad as usual with our dinner, and that was the FIRST THING Aoife ate.