52 Cards – #3

I’m a day late with my weekly installment — we had a big family outing on Sunday, which is our usual crafting day, so we did short and easy this week. I actually have not yet added the Mod Podge to seal them and make sure everything stays where it belongs.

image


Aoife’s is on the left, mine is on the right.

Aoife used some fabric Sharpies on hers, with an eyedropper of water to smudge everything. I precut a couple of images and let her pick one (although I admit, I saved those gorgeous purple mushrooms for myself).

For mine, I painted it with yellow acrylic and added the description of the mushroom from an old Golden Guide, then added the mushrooms right on top.

image (1)


Aoife added more fabric marker on the back, with enough water to effectively eliminate most of her efforts. I experimented with tearing strips of paper with illustrations and then collaging them together, with mixed results.

I still love this project, and I can tell that Aoife even looks forward to it — she loves when I get out the paints and supplies!


Toddler Time: Unexpected Toys

IMG_0089

Aoife is well into toddler-hood, and recently I’ve been struck by how she can take nearly any household object and turn it into a plaything. The most amazing thing is actually watching her learn, because just about anything she plays with, she learns from.

Here are some of the most unexpected “toys” that Aoife loves:

  1. Rolls of packing tape. These are fantastic for rolling on the floor or stacking into a tower (and then knocking it down).
  2. Notecard sets. A small box of stationery gives Aoife near-endless entertainment as she takes the cards out of the box, then takes the envelopes out of the box, then puts the cards in, then puts the envelopes in, then takes the envelopes out …
  3. Books of all sizes. Even when Aoife was younger, we joked that A Game of Thrones was her favorite book. She always picked that one up and carried it around because it was a perfect size for her to grasp easily. Now she loves flipping through whatever books are lying around, which is quite a variety, in our house.
  4. Skeins of yarn. Yarn is easy to hold on to, and Aoife’s favorite activity with yarn is to pull it across the floor and entice the cats to chase her. It’s great that she can have a couple of “playmates” while she runs around and around the living room. She thinks this whole process is hilarious.
  5. Wire cooling racks. Possibly the strangest entry in this list. Aoife loves to tap these against the metal baby gate or on the floor, making “music”. I think she choose the cooling racks over other pots and pans because they’re easy to grasp and light to carry. She also loves putting these on the floor and then standing on them, which is not mfavorite activity for her.

What would you add to this list?

52 Cards – #2

While I’ve named this series 52 Cards (I know, I’m so original), I could also subtitle it “How Many Times Can I Turn My Toddler Loose with Paint Without Losing My Sanity?” Getting ready for any type of art project with a child takes a little bit of preparation and a lot of patience.

Today I let her pick out a bird image from an old field guide I have, and she chose an emu. That led to my inspiration, because the cassowary was on the other side of the emu page. I noticed in the description that the cassowary is native to Australia, so I tore apart a map and layered Australia behind the bird image. Believe it or not, it was only after I glued down the map and the bird that I noticed that we’d used the ace of spades, leaving a nice A in the corner to stand for Australia. In addition to our “found” papers, we used acrylic paints and Mod Podge.

Here are the fronts of our cards (mine is on the left, Aoife’s is on the right):

photo 1 (1)

And the backs:

photo 2 (1)

I’m really happy with how mine turned out, and Aoife’s is always amazing. Instead of just putting down several blobs of color for her to choose from (because she would usually choose ALL THE COLORS), I had her tell me one color at a time that she wanted to use. Today the most interesting thing for her was to dip her paintbrush in the paint and then directly into the water, coloring the water instead of her card.

As much as it takes a little more prep and clean up, I love this little weekend project we have going. Aoife has no fear and no knowledge of technique, so she is constantly experimenting. I always try to think about four steps ahead, making me much more hesitant to use any of my materials. I’m learning to be fearless, and I’ve apparently been waiting for a two-year-old to teach me.

Half-Camping

IMG_0109


We recently had the opportunity to spend some time at a nearby lake and enjoy the great outdoors. We fully intended to camp, and we proceed to set up the tent and build cookout fires during the day. But as the temperatures continued to climb and the wind picked up, we decided to eat dinner and then pack it in for cooler pastures.

IMG_0113


Even so, we had a highly enjoyable day getting Aoife out and about doing something a bit different from the norm.

When you camp with kids, you can count on doing several things:

  1. Throwing rocks in the water
  2. Eating (our favorites are fire-roasted veggies, vegan hot dogs, peanut butter-tortilla roll-ups, and applesauce)
  3. Finding cool sticks
  4. Wishing you’d used more sunscreen (no matter how much you globbed on previously — you always wish you’d used more)
  5. Less napping than you are used to
  6. Not relaxing nearly as much as you thought you would

IMG_0108

It’s been over a week since we’ve come back, and nearly every day Aoife pretends that she is packing her backpack full of clothes or that she is kicking the water at the lake. As much work as it can be to plan ahead, prepare food, set up a tent, take it down again, and tell your children many many times to stay back from the fire/water/scorpions/whatever, it is so worth it to give them a chance to enjoy the world around them. Camping is messy and exhausting, which I think are practically requirements when creating lasting memories.

IMG_0117


If you end up coming home earlier than expected, that’s ok. If your child only takes a 30 second nap, that’s ok. These are building blocks for the foundation that is meant to hold a life.

52 Cards – #1

One of the projects to which I alluded in my birthday post is called 52 Cards. I went an embarrassingly long time in my life without realizing that the number of cards in a deck is the same number of weeks in a year. With that in mind, and partially inspired by Elise‘s Daily Card project (no longer online), I decided that I would alter a playing card each week. I was thrilled when I found that I had a second deck of cards stashed away — it meant that I could do this project together with Aoife.

My personal goal for this project is to have 52 chances to use variety in my art and not have anything really in mind prior to creating. I get so caught up thinking that this piece has to be perfect. These are just playing cards — small and cheap, so I won’t feel so bad if I have a couple of duds in there. I want to try different techniques, materials, and experiences and have an album that I can flip through for inspiration. My plan is to get a binder with baseball card sleeves — those should hold playing cards perfectly.

My goal for Aoife is to let her play with some of the same materials that I am using. She can choose colors, play around, and make decisions herself as to how she wants to apply materials to her card. This is something we can do together and I think it will be fun to see what we both create.

photo 1 (1)  The first step was preparing the cards so that they’ll take adhesive or paint. I used some medium grit sandpaper to rough up both sides of the cards.

photo 3 (1)


Then we were ready to create!

photo 4 (1)

photo 2

Today we used some pages from a book I have that’s in Spanish, green tissue paper, and acrylic paint. Aoife painted what you see above — I’m quite impressed with what she ended up with.

Here are the fronts of our cards (Aoife’s is on the left, mine is on the right):

photo 3 - Edited


And the backs:

photo 4


I let Aoife run the glue stick and the paintbrushes, and then I finished hers and mine up with a coat of Mod Podge on either side to secure everything. You can tell that the edges curled up in the picture; once the Mod Podge was dry, I put a couple of tile coasters on top of them to help them flatten out.

I love the rough look of them and how they turned out in general. It was so fun to turn Aoife loose with her card and work on mine alongside her. I can’t wait to mix it up with some found materials, items in the recycling bin, or whatever else I come up with for next weekend!

On Turning 30

old40storm - edited

Maybe it hasn’t hit me yet, but turning 30 doesn’t scare me.

I have this notion that my 30s will really be a time for me to get to know myself. I’ve done a lot of changing over the last decade, and I’m sure I’ll do the same in this coming one, but I hope that I will approach those changes with more confidence and less stress. I’ve spent a lot of time worrying, and becoming a parent — while accompanied by plenty of worrying, in forms I’d never known — has helped me see that time spent worrying is sometimes time spent wasted. Yes, worrying can lead to greater understanding and sometimes to solutions, which is great. But worrying with no cause and to no end — I have better things to do.

Last year, I’d created a list of things I’d like to do before I turned 30. Some of them got completed; some did not. Here’s a run-down:

  1. Run a 10K — Fail. I did get back up to a solid 5K time, although I haven’t been consistent.
  2. Have a bike picnic — Picnics yes, by bike no.
  3. Get another tattoo — Yes! On my right wrist. I love it.
  4. Be 10 lbs lighter — Yes! Muscle definition abounds.
  5. Knit a scarf — Done! Not extremely well, but I like the cowl I ended up with.
  6. Make a cookbook — Nope.
  7. Go camping — Yes! Although we did not stay overnight. More info to come.
  8. Pay off credit card — Sadly, not yet. Still plugging away at that debt though.
  9. Go to a theater performance — Nope.
  10. Decorate a fancy cake — Yes!
  11. Make a big painting for the house — Kind of?
  12. Make a t-shirt quilt — Nope.
  13. Explore my hometown — I’ve taken Aoife to 5 different playgrounds and done lots of walking, although we haven’t done “touristy” things.
  14. Visit a local museum — Nope.
  15. Take a dance class — Nope.
  16. Go sledding — Yes! Aoife hated it.
  17. Sharpen knives — No, I’m still risking injury every time I cook by using dull knives.
  18. Get a pedicure — Yes! This was one of the first things I did, and let me tell you, it’s time for another one.
  19. Find my perfect shade of lipstick — I found a couple but haven’t settled on anything for daily use.
  20. Have a date night with Ryan every month — Well … we didn’t always call it an official date night, but I’d say we succeeded here.
  21. Create use-able space in the basement — Not exactly.
  22. Visit a ghost town — Nope.
  23. Write a handwritten letter once a month — Nope.
  24. Make a friend outside of work / be a better friend — Not especially.
  25. Bake a pie from scratch — Yes! For Thanksgiving.
  26. Learn to change a tire — Yes! If you count stroller tires. I did not do this for our car.
  27. Fill all my empty picture frames — Nope!
  28. Write a will and make it official — Nope!
  29. Get a bra professionally fitted — Nope!
  30. Visit a state park — We did this, but it overlapped with #7 above.

So 13 out of 30 isn’t terrible. I think many of these I ended up not really caring about (sharper knives? really? they cut just fine!), so I wasn’t fully engaged in doing them and I actually forgot half of what was on my list anyway over the year.

The best result out of all of this list-making is realizing that I’m not defined by this list and by the things that I want to do. I should remember the things that I accomplished rather than dwell on the things that I never got to, especially if I didn’t really care about them in the first place. Instead of focusing on checking off each little item, I (for the most part) lived in the moment and enjoyed life as it came, welcoming spontaneity and changing plans — something that used to be very difficult for me. Again, I chalk a lot of this up to becoming a parent — it was a situation that forced me into accepting life as it is, not as I think it should be.

And that is NOT to say that I think you have to become a parent to have that realization. I think any experience that stretches your abilities, your mind, your confidence — travel, getting a new job, getting married — any challenge — can help you realize it. For some, it happens long before 30; for others, long after.

I spent the last year learning about myself. Learning about my daughter, this wonderful person who is still quite new to the world and who has her own personality and quirks. Learning about my job and what it is about it that I truly love (thankfully, that includes most everything of what I do). I learned that I waste time when I have a Facebook app on my phone, so I deleted it. I learned that I really don’t care about Twitter, even though I have felt in the past like I should.

I learned that life is a process. Plans can change. Plans sometimes should change. I learned that I can welcome change in myself and it makes me stronger. I learned that I welcome the next decade — heck, even the next three decades or six or however many I am meant to have. I learned that I can keep striving to be the best person I can be, for myself and for others — and I’ve learned that I can let go of that ambition if I just need a bit of time to gather my thoughts, and I don’t have to beat myself up for needing that. There is strength in that, too.

I’ll be back again soon to let you know of a few plans and projects I have up my sleeve for this coming year.


How I Track My Money

edit-main

I’m a big fan of creating a budget and sticking to it, especially when you’re pretty strapped for cash. Between owning a business and starting a family, the past couple of years have necessitated a budget. I’m proud to say that we have not racked up any new debt, which is impressive after several years of doing just that. I wanted to share one of the tools that is most instrumental in tracking my income and expenses.

Several years ago, I was the champion of balancing my checkbook. I did it every month without fail and always balanced. Then I started using debit cards much more, and keeping receipts and writing down amounts got to be way too cumbersome, so I just didn’t do it. When you know things will be covered, that’s not terrible — but sometimes you want (and should want) a little more control. I tried using Mint for a while, but my online banking required so much verification that it wouldn’t sync easily with Mint, and there were so many things being saved as “Uncategorized” that I was spending too much time editing transactions and it just didn’t work well for me.

One thing I am consistent about is opening up my Google email and calendar every morning. From there, it’s easy enough to click into Google Drive and open up my “predictive check register”. I call it that because the most useful aspect of it is that I add future income and expenses so that I can see if my balance will ever drop to dangerous levels and I can adjust as needed. You’re welcome to use whatever kind of spreadsheet program you like — I love using Google Drive because it ties in with other services that I use, there are plenty of smartphone apps, and it’s free. You can also share your spreadsheet with another Google user, so if several people in your household need to track finances all in one place, this is the way to do it.

Let me introduce you:

arrows

Column A: The dates of the income and expenses. I get paid twice a month, so I have those dates in place. I list due dates (or estimated due dates, as some of them change) next to the name of the expense (Column B).

Column B: The name or category of the income or expense. Keep them generic or make them specific based on your needs.

Column C: The amount of the income or expense. These are just samples, so don’t get too excited. You can put exact amounts if you know them, but when planning ahead you sometimes have to estimate. I like to round up to the nearest dollar or the nearest $10 — so, if I have a bill that is $68, I will estimate $70 or even $75 to give myself a cushion. I check my account online at my bank’s website so I can see what’s gone through. I change the text to bold if it has gone through; this way there are no surprises. When I put in my income, I put a minus sign ( – ) in front of the amount so that my formula works in Column D.

Column D: This is the running total. If you’re just starting out with this process, you’ll put your starting balance in the very top (where you can see the $200 in the image). Then you put in a simple formula (in this example, and if you’re using Excel or Google, it would be =D1-C2 so that your expenses are subtracted from the running total number above it). Fill the rest of the cells going down with the formula, and you should be good to go.

I mentioned that I make the text bold when an expense goes through my bank account. I love this because I can see what last went through and then look across to Column D to get the total that my bank account should be. I compare that with my online banking to essentially “balance” my checking account.

I can also look ahead and see where my account will be the lowest, or if cash is building up and we’ll have enough money for something fun. If unexpected expenses (or income, but let’s be honest, that’s rare) come up, it’s simple to add them in on the date they occur by inserting a new row. Then I can fill the appropriate cells with the formula and see how it will affect my account a few months down the road.

I’ve been doing this very consistently since October, and it’s been honestly one of the best ways I’ve found of tracking my finances and staying on top of everything.

How do you track your finances? 

Loving lately…

This post from Funny Shade of Green has made me even more excited for our upcoming camping trip.

The True Detective opening was one of the most powerful two minutes of television for me when we were recently watching the first season on DVD. It’s an HBO show, so be warned that you’ll see a few things in this video.

ChicRunner posted a 4-month marathon training plan that seems do-able. Running a marathon is still on my “life list”, but it’s been a while since I’ve even gone running (pushing a jogging stroller in 95 degree heat is just not pleasant after work). Got to get back out there!

We use our original flavor Table Topics cards nearly any time we have people over at our house (thanks, Meghan!), and I discovered that they also have a Family Gathering version — these would be great for family reunions! And how fun would these be on road trips?

Holy mackerel — video of someone beating Super Mario Bros. in under 5 minutes. Memories!

Also loving? Getting our house decluttered and keeping it clean.

Thoughts on a Second Birthday

Sometimes I read blog posts about parenting looking for answers to questions that I have. And sometimes I read them because I want reassurance that everything will be ok and that I’m not alone.

This is the latter kind of post.

IMG_9877

Just for the record, the world has not ended because …

  • I used ridiculous amounts of food coloring in Aoife’s birthday cake.
  • We totally forgot about singing “Happy Birthday” (which I’m actually ok with, because that was always the part of my birthday parties that I hated the most — still do!).
  • We, Aoife’s parents, did not buy her a gift. We counted our trip to the zoo last month as her gift.
  • We had Aoife open gifts as people came with them. This way she could see who the gift was from, there were no meltdowns because she had to wait for a designated gift-opening time, and the giver could talk to her right away about the gift. This was also less overwhelming for Aoife (and for us).
  • There were visible glue globs on my paper bunting cake toppers.
  • We had the party at a local playground and used completely disposable dinnerware. There was no cleanup and I had no regrets.

IMG_9886

Could I have made this birthday party into a Pinterest-worthy event? Sure, if I would have taken a few days off work and spent money I don’t have. But my aim is not to give Aoife picture-perfect birthdays. It’s to shower her with love (and yes, a few gifts) and help her make memories that are worth keeping, and I think this was a success.

IMG_9901

I’ll be sure to keep you posted when she’s in her thirties and going to therapy because, dammit, we didn’t sing at her party.

Rainbow Layer Cake

We recently celebrated a second birthday for our sweet little girl. She’s not to the point of having a favorite color yet, but she’s learning colors right now and I wanted to have a colorful cake for her. Forgive the phone pictures — it was late when I baked.

photo 4


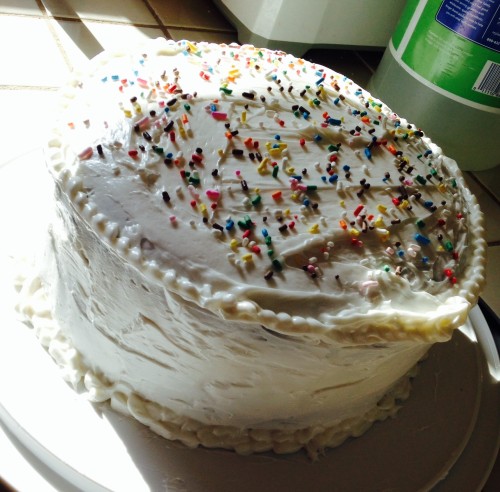
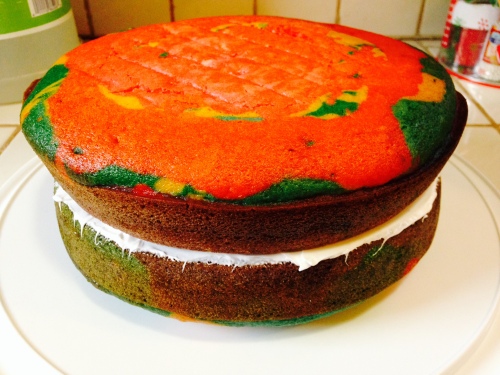
Looks delicious, right? And colorful — wait, what’s that? No?
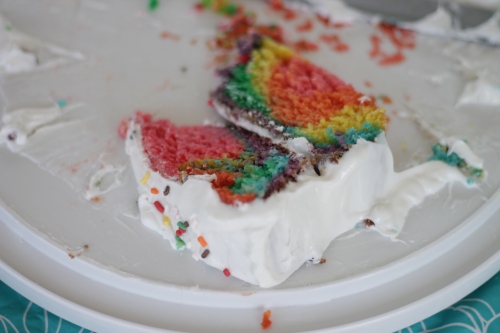
IMG_9881

How about now?

This cake was a lot of fun to make and, for the record, my first layer cake. Here are the steps so you can make your very own.

You can use any white cake mix or recipe; I used the vanilla cupcake recipe from The Joy of Vegan Baking, which is my go-to. For two layers, you’ll need to make a double batch (or just mix it up twice like I did — I only have one round cake pan). Mix up the batter and divide into six bowls. Add food coloring accordingly so that you have red, orange, yellow, green, blue, and purple.

photo 2

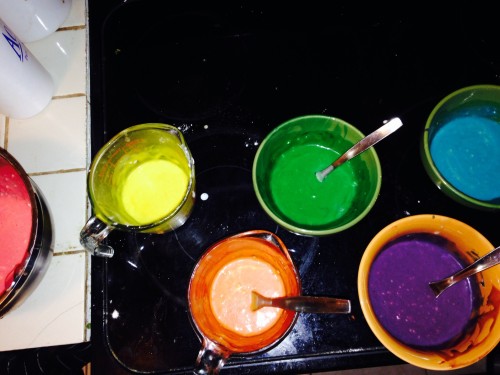
Can you believe how technicolor that batter is?

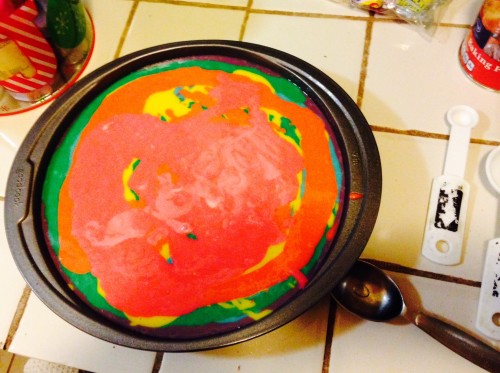
Once you’ve got your batter prepped, add to a round 9″ cake pan. I added all of the purple first, then blue, green, yellow, orange, and red so that my rainbow would be right side up. Really, this doesn’t matter too much — it won’t go in perfect layers and will have more of a tie-dye effect.

photo 1

Bake according to your recipe or package directions. If you have only one cake pan, like me, you’ll have to bake your cake and let it cool before you can remove it and then proceed with layer #2. Once layer #1 is cool, you can use a butter knife to go around the sides of the pan to loosen the cake. If it’s completely cooled and you are very very lucky, it will come out of the pan clean. You’ll want to turn it upside down on your surface so that the curved top of the cake is facing down.

photo 2

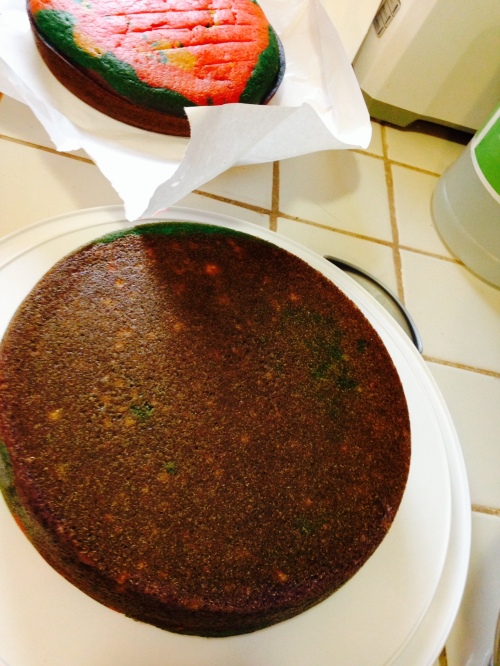
Voila! You can see layer #2 in the background. This picture was taken the following morning. I did this whole process in two sessions: the night before the party, I baked the cakes, let them cool, and then wrapped them individually in freezer paper and put them in the refrigerator. Then it was 11:30 and I went to bed.

The next morning, I put layer #1 on my lovely cake transporter base and then started prepping the frosting. When I say prepped, I mean I opened the tub of Duncan Hines “Fluffy White” and dumped it in the KitchenAid mixing bowl, whipping it to make it go farther and spread a little more easily. If you’re using packaged frosting, you will probably need two tubs (this will give you a little leftover for taste-testing).

photo 1 photo 3 photo 2


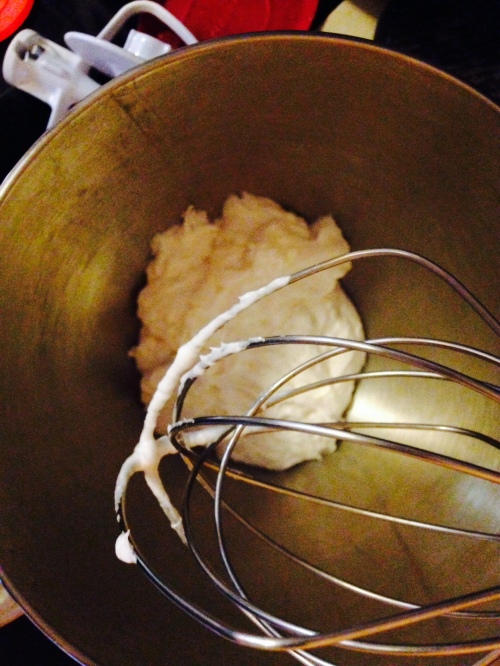
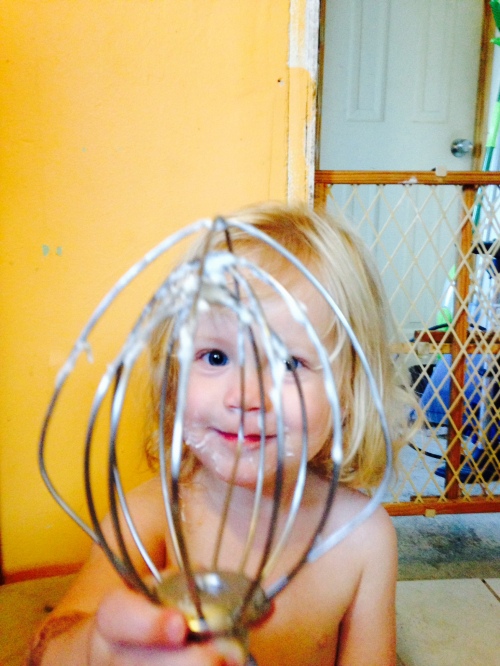
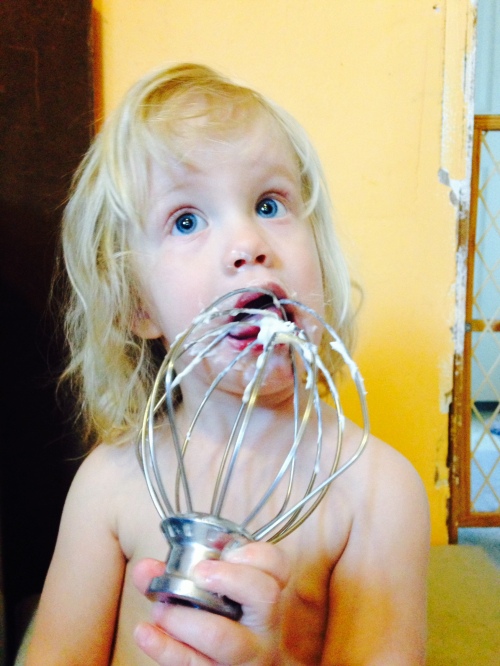
Like so. I’d hoped to finish everything before this little munchkin woke up, but to no avail.

Once your frosting is ready, you’ll want to put frosting on top of layer #1 before you put layer #2 on top. I used maybe half a cup of frosting in the middle. I probably could have used more, but I wanted to be sure that I had plenty left (and I did — too much. It was delicious).

photo 3

Put your second layer on top, with the curved top side facing up. I followed the directions in my cookbook for essentially doing a crumb coat. Lightly frost the sides and top of the cake and then place it in the fridge for around 30 minutes, until the frosting isn’t tacky anymore. This will help ensure that you don’t get crumbs in your frosting.

photo 1

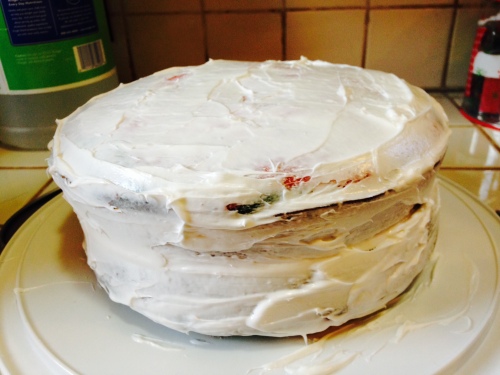
When you take the cake out of the fridge, then you’re ready to finish up your frosting. Add frosting to the sides and the top, using a butter knife (or a cake decorating smoothing tool, if you’ve got it — I don’t!) to smooth it out as you go. My motto is “When in doubt, add more frosting.”

Once you’ve got it looking pretty even and uniform, put more frosting in a plastic zipper bag and snip one of the corners, or use a cake decorating tip and bag to dot frosting around the base of the cake and the top edge. This really helped make the cake look more structured and it filled the gap at the base. Plus it added more frosting.

If you’d like, add sprinkles to the top to hint at the rainbow goodness inside.
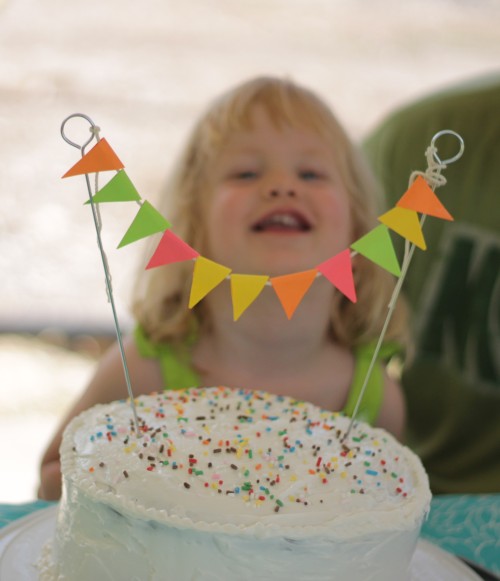
IMG_9874

Serve with a smile!

So my first layer cake turned out pretty darn good — and tasty, despite the ridiculous amount of food coloring that was involved.